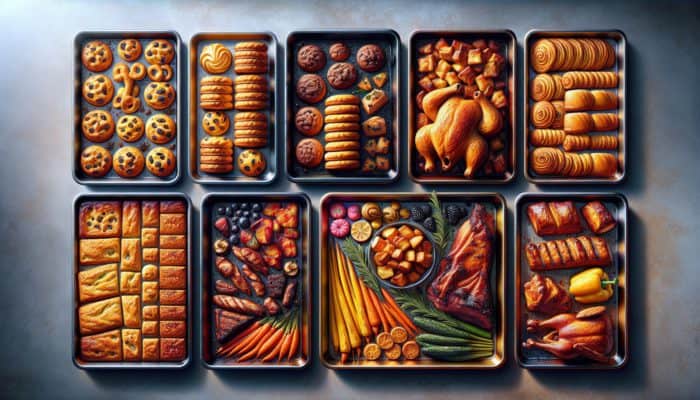
Enhance Your Baking Skills: Must-Have Tools for Making Perfect Bread
Baking exceptional bread is more than just a hobby; it’s a fascinating combination of artistry and scientific precision that requires the right tools for baking perfect bread. Regardless of your experience level—whether you're a novice or a seasoned baker—having the correct equipment can significantly improve your breadmaking prowess and elevate your overall baking journey. Let’s dive into three essential tools that will set you on the path to baking success.
Boost Your Dough Management with a Multi-Purpose Dough Scraper
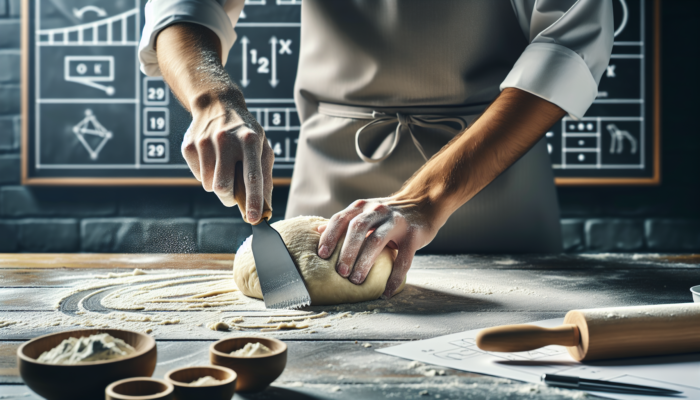
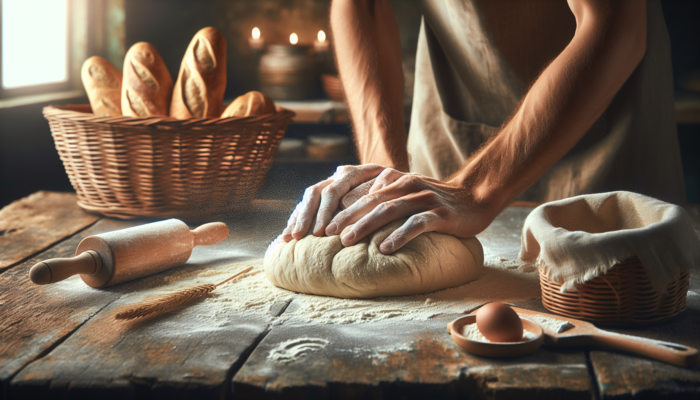
A dough scraper, commonly referred to as a bench scraper, is an indispensable tool for any serious baker. Beyond its primary function of managing dough, this versatile implement extends its utility to cutting, shaping, and transferring dough seamlessly, making it an essential asset for anyone passionate about crafting remarkable bread. Its design allows for precision and ease, ensuring that your baking process is both efficient and enjoyable.
When working with sticky or wet dough, a dough scraper becomes your best friend, enabling you to lift and fold without creating a mess, thus maintaining the structure and integrity of your dough. Additionally, it aids in keeping your workspace tidy by allowing you to gather scraps and maintain organization. Most dough scrapers are ergonomically designed for a comfortable grip, providing you with control as you shape your culinary masterpieces.
Investing in a durable, stainless steel dough scraper can transform your baking experience. The heft of a metal scraper offers the control necessary for detailed tasks such as shaping artisan loaves. Moreover, they are easy to clean and maintain, ensuring that your essential tools for baking perfect bread remain in excellent condition for years to come.
Ensure Accuracy in Your Baking with a Reliable Digital Scale
In the realm of baking, accuracy is crucial, which makes a high-quality digital scale an essential tool for precise ingredient measurement. Unlike measuring cups, which can introduce inconsistencies due to factors like packing or settling, a digital scale provides exact measurements in grams or ounces. This precision is vital for achieving consistent results in every baking endeavor.
In bread baking, even minor variations in ingredient quantities can lead to significant changes in the final product. A digital scale enables you to weigh flour, water, and yeast with remarkable accuracy, which is especially important when experimenting with new recipes or adjusting hydration levels. With this tool, you can rest assured that your measurements are spot on, paving the way for reliable and repeatable baking achievements.
Furthermore, many digital scales come equipped with a tare function that allows you to reset the weight of your mixing bowl to zero. This feature simplifies the measuring process, ensuring that you integrate the right ingredients into your dough accurately. By incorporating the digital scale into your baking routine, you establish a solid foundation for exceptional breadmaking.
Enhance Your Dough's Rise with a Quality Proofing Basket
A proofing basket, often known as a banneton, is a traditional tool that plays a pivotal role in the breadmaking process. This essential implement is designed to cradle dough during its rising phase, providing crucial shape and support while facilitating proper airflow. Typically made from natural materials like rattan, the unique structure of a proofing basket helps absorb moisture, creating an optimal environment for dough to proof effectively.
Utilizing a proofing basket can significantly enhance your breadmaking experience. Not only does it offer vital support to the dough, but it also imparts an attractive pattern to the crust, boosting the visual appeal of your baked goods. Once your dough is ready for the oven, simply invert the basket onto your baking surface to unveil the stunning spiral design it leaves behind.
Choosing the correct size for your proofing basket is essential, depending on the type of bread you intend to bake. Smaller baskets are ideal for boules, while larger ones work well for batards. Investing in a high-quality proofing basket will enrich your breadmaking routine, ensuring your dough rises beautifully and bakes evenly.
Perfect Your Bread Baking Skills: Essential Techniques for Exceptional Results
Having gathered the essential tools for baking perfect bread, it’s crucial to delve into the techniques that can elevate your bread from ordinary to extraordinary. Mastering kneading, proofing, and scoring are vital skills that can transform your baking endeavors into remarkable culinary achievements.
Master Your Kneading: Developing Gluten for the Ultimate Bread Texture
Kneading is a fundamental technique that fosters gluten development, the protein responsible for the structure and chewiness of bread. Familiarizing yourself with various kneading techniques can significantly impact your breadmaking journey. While traditional hand-kneading offers a satisfying and therapeutic experience, a stand mixer can also efficiently handle this task.
When kneading by hand, focus on techniques that involve stretching and folding the dough. This method aligns the gluten strands, forming a robust network that captures gases during fermentation. If you opt for a stand mixer, it’s essential to monitor the dough closely to avoid over-kneading, which can lead to an undesirable tough texture.
Incorporating the windowpane test is another effective technique. This allows you to ascertain whether the gluten has developed sufficiently by stretching a small piece of dough between your fingers. If the dough stretches thin enough to let light pass through without tearing, you’re on the right track. Mastering kneading techniques ensures your bread achieves the perfect texture, making every bite a delightful experience.
Optimize Your Proofing Process: Using Time and Temperature for Ideal Dough Rise
Proofing, or fermentation, is a crucial phase in the breadmaking process. During this pivotal time, yeast consumes the sugars in the dough, generating carbon dioxide that causes the dough to rise. The temperature and duration of proofing can drastically affect the flavor and texture of the final product.
There are two primary types of proofing: bulk fermentation and final proofing. Bulk fermentation occurs after kneading, allowing the dough to rise before shaping. This phase is vital for developing robust flavor and texture. Final proofing takes place after shaping the dough and just before it’s ready for baking.
Temperature plays a significant role in proofing. Warmer environments accelerate fermentation, while cooler conditions slow it down. Generally, aim for a temperature around 24-27°C (75-80°F) for optimal yeast activity. To check if your dough is ready, gently press it with your finger. If the indentation springs back slowly, it’s time to bake. Mastering proofing techniques will guarantee that your bread rises perfectly and develops rich flavor.
Artistry in Scoring: Creating Beautiful and Functional Designs on Your Bread
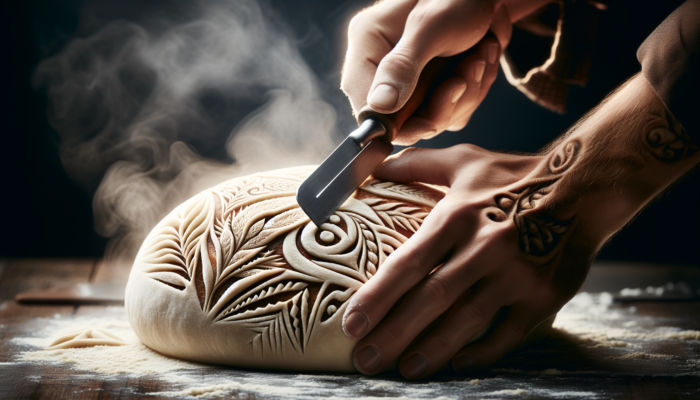
Scoring, or slashing the dough before baking, serves not only as a decorative element but also as a vital technique that allows steam to escape, preventing the dough from bursting in unintended areas. The method in which you score your bread can significantly affect its final appearance and texture.
Using a sharp blade, such as a bread lame, practice making clean cuts on the surface of the dough. Depending on your skill level, you can create simple crosses or more intricate designs. The depth and angle of your cuts will greatly impact how the bread expands in the oven, a phenomenon known as “oven spring.” A deeper cut allows for greater expansion, while shallower cuts yield a subtler effect.
Scoring also provides an excellent opportunity to showcase your creativity. Experiment with various designs and patterns to make your loaves truly unique. With practice, your scoring skills will enhance both the functionality and artistic flair of your bread, elevating your baking to a professional level.
Explore the Science of Bread: Understanding Key Ingredients for Success
To excel in bread baking, it’s essential to understand the ingredients that combine to create the perfect loaf. The primary components are flour, yeast, and water, each possessing unique properties that directly influence the final product.
Flour: Understanding Different Types and Their Impact on Bread Quality
Flour serves as the foundation of any bread recipe, and comprehending the various types available is crucial for achieving the desired outcomes. The most common varieties include all-purpose, bread, and whole wheat flour. Each type has differing protein content, which plays a significant role in gluten development and the overall texture of the bread.
Bread flour, with its higher protein content, is ideal for yeast breads, as it provides the necessary structure for a good rise. While all-purpose flour can suffice in a pinch, it may not yield the same chewy texture. Conversely, whole wheat flour adds a nutty flavor and denser crumb but often requires additional hydration due to its higher bran content.
When experimenting with flours, consider blending different varieties to achieve your desired texture and flavor. For example, mixing bread flour with whole wheat can create a delightful balance of chewiness and depth. Understanding the various types of flour and their characteristics is fundamental to mastering the art of baking perfect bread.
Yeast: Uncovering Yeast’s Essential Role in Fermentation and Dough Rising
Yeast is a living organism that plays a critical role in fermentation, converting sugars into carbon dioxide and alcohol. This gas is what causes the dough to rise, imparting that delightful airy texture to your bread. There are various types of yeast, including active dry, instant, and fresh yeast, each with unique properties.
Active dry yeast requires activation in warm water before use, while instant yeast can be mixed directly with dry ingredients, making it a convenient choice for quick baking. Although less common, fresh yeast offers a robust flavor and is often preferred by professional bakers.
Understanding how to handle yeast is crucial; factors such as temperature, sugar content, and hydration levels can significantly affect yeast activity. Monitoring these elements ensures you achieve the perfect rise and flavor in your bread. Mastering the science of yeast will unlock the secrets to consistently exceptional bread.
Water: The Critical Role of Temperature and Hydration Levels
Water is a vital yet often overlooked ingredient in the breadmaking process. The temperature and amount of water used can significantly influence dough development and fermentation. The ideal water temperature for activating yeast falls between 38-43°C (100-110°F).
Hydration levels also play a crucial role in determining the quality of bread. Higher hydration doughs yield a lighter, airier texture, while lower hydration creates denser loaves. Experimenting with various hydration levels can lead to exciting results, allowing you to tailor your bread to your preferences.
It’s essential to consider the water content in your recipes, especially when working with whole-grain flours, which tend to absorb more moisture. Adjusting hydration levels can dramatically affect your bread, making it a vital factor in crafting that ideal loaf.
Your Comprehensive Guide to Essential Tools for Baking Perfect Bread
Now that you understand the ingredients and techniques involved, it’s time to explore the essential tools that will enhance your bread-baking experience. Making informed investments in high-quality tools will ensure your journey into breadmaking is both fruitful and successful.
Stand Mixer: Key Features to Consider When Choosing Your Ideal Model
A stand mixer can greatly enhance your breadmaking process. When selecting the right model, focus on features that improve functionality and ease of use. A powerful motor is essential for effectively kneading dough, and a spacious mixing bowl is ideal for accommodating larger batches.
Look for models that come with various attachments, such as dough hooks, specifically designed for kneading, saving you both time and effort. A tilting head or lift design enhances accessibility, making it easier to incorporate ingredients.
Investing in a high-quality stand mixer can streamline your baking process, freeing up time and energy so you can concentrate on refining your technique. With the right stand mixer by your side, you’ll find yourself baking bread more frequently, experimenting with new recipes, and enjoying the fruits of your labor.
Oven Thermometer: Ensuring Accurate Temperatures for Perfect Baking
Precision in temperature is critical in baking, and an oven thermometer is a must-have tool for any serious baker. Many ovens may have temperature discrepancies, leading to unpredictable baking results. By placing an oven thermometer inside your oven, you can verify the actual temperature and make necessary adjustments.
Proper oven temperature is crucial when baking bread, as it ensures that the bread rises correctly and develops a beautiful crust. Most bread recipes recommend a temperature range of around 190-220°C (375-425°F). An oven thermometer will help you achieve this consistently, resulting in perfectly baked loaves every time.
Moreover, consider using a baking stone or steel alongside your oven thermometer. These tools effectively retain heat, promoting even baking and creating a crust that is both crunchy and flavorful. Together, they form a powerful combination for successful bread baking.
Baking Stone: Benefits of Using a Stone for Uniform Heat Distribution
A baking stone is another essential tool that can significantly improve your bread-baking outcomes. By providing a consistent and even heat source, a baking stone helps achieve a beautifully baked crust while retaining moisture inside the loaf.
When preheated, a baking stone absorbs heat and radiates it evenly, mimicking the conditions of a traditional brick oven. This feature is particularly beneficial when baking artisan breads, which require high temperatures for optimal crust development.
For best results, preheat your baking stone for at least 30 minutes before placing your dough on it. The stone will ensure your bread rises quickly, leading to a delightful oven spring and producing a professional-quality loaf. Investing in a quality baking stone will enhance your breadmaking experience and empower you to confidently explore new recipes and techniques.
Transform Your Home Baking Experience: From Novice to Expert
With the right tools and knowledge, anyone can master the art of baking perfect bread at home. Whether you're just starting or looking to refine your skills, there are numerous strategies that can elevate your baking game.
Beginner's Guide: Simple Steps to Start Your Bread-Baking Journey
Embarking on your bread-baking adventure can be both exhilarating and intimidating. Start with straightforward recipes that require minimal ingredients and techniques. Basic white bread or no-knead recipes are excellent choices for newcomers, allowing you to focus on mastering foundational skills.
Familiarize yourself with the essential tools for baking perfect bread mentioned earlier. A digital scale, dough scraper, and proofing basket will streamline the process and enhance your enjoyment. Don’t hesitate to experiment with various flours and hydration levels as you build confidence in your abilities.
Lastly, embrace the entire baking journey. Bread baking is as much about the experience as it is about the end result. Keep a baking journal to document your experiences, noting what works and what doesn’t. Celebrate your successes while learning from your failures. With patience and practice, you’ll reach new heights in your baking endeavors.
Advanced Techniques: Challenging Recipes for the Skilled Baker
Once you have mastered the basics, it’s time to challenge yourself with more complex recipes and techniques. Consider venturing into sourdough, which requires a deeper understanding of fermentation and flavor development. Creating your starter can be a rewarding endeavor, allowing you to experiment with wild yeast and enhance the flavor of your bread.
Other advanced techniques include shaping and scoring for artisanal breads, as well as experimenting with different flour types and add-ins like herbs, cheese, or nuts. These elements can introduce depth and character to your loaves, showcasing your creativity as a baker.
Engage with the baking community, whether online or in-person, to gain insights and share experiences. Interacting with fellow bakers can inspire fresh ideas and techniques to further enhance your skills. Remember, the baking journey is ongoing, and there’s always something new to learn.
Troubleshooting: Identifying Common Baking Issues and Solutions
No baker is immune to occasional mishaps. Understanding common baking challenges and their solutions is essential for improvement. For example, if your bread fails to rise, it may be due to inactive yeast or insufficient proofing time. Always check the expiration date of your yeast and ensure it is stored correctly.
If your bread turns out too dense, consider adjusting your hydration levels or kneading duration. A well-kneaded dough will have a strong gluten structure, allowing for optimal gas retention. Conversely, if your bread rises too quickly, it may be due to high kitchen temperatures or overly active yeast.
Keep a troubleshooting guide handy for reference as you encounter challenges. Learning from your mistakes will only enhance your skills as a baker. With patience and perseverance, you will overcome these hurdles, leading to the perfect loaf every time.
Upgrade Your Baking Skills: Additional Tools for Bread Making
As you continue your baking journey, consider incorporating extra tools to further enhance your skills and results. Each of these tools offers unique benefits that can improve your breadmaking experience.
Bread Lame: Achieving Precision Scoring for Stunning Loaves
A bread lame is a simple yet effective tool for scoring dough with precision. With its sharp blade, you can create intricate designs that enhance the visual appeal of your bread. Clean cuts ensure that your dough expands appropriately during baking, resulting in a beautifully formed crust.
Initially, using a lame may feel intimidating, but with practice, you’ll gain confidence and control. Experiment with various patterns and styles to discover your signature touch. A well-scored loaf not only looks impressive but also boasts a consistent texture and crust, making it a valuable addition to your collection of